Posts tagged home
leaning into summer with Walmart Home
 

I made homemade ice cream. I REPEAT, I made homemade ice cream.

Heading into summer, I’ve been on the lookout for a few home items. Mostly some fun, yet comfy outdoor furniture and colorful glassware + matte gold flatware. I found both at Walmart (did you know they have a TON of beautiful home finds online?!) and when I spotted a gold-rimmed sorbet glass, I was inspired to get my first ever ice cream maker. I opted for white, but it comes in pink and red, and let me tell you, it helped me make some DELICIOUS pistachio ice cream.

I’m still planning to get some outdoor furniture here soon and found a bunch of cute options at Walmart. I just need to figure out what I like the best…

middle3.jpg
middle4.jpg
closeup2.jpg
middle1.jpg

SHOP THIS POST

outdoor.jpg

SHOP OUTDOOR

This post is part of a paid partnership with Walmart, but all opinions are my own.

 
Our Bedroom Shelves

When we first saw the recessed walls in the bedroom, I knew right away that they would be perfect for adding shelves, and once we moved the bed to in front of the windows, I prioritized this wall in particular for shelving. The only thing was, I wanted them to look built-in. Like they could have been sculpted from plaster. Basically, I wanted a different look than the wood shelves we’ve always installed in the past. We decided to make the shelves out of our go-to wood from the hardware store, but use a combination of caulk, spackle, and paint to create a seamless look.

If there’s one thing to know about my working relationship with David, it’s that I’m usually the one with the initial vision and he’s the one that problem solves how to make it happen. We then collaborate on the finer details, i.e how many shelves, how thick are they, and so on.

I would be lying if I said that we add this all mapped out from the beginning. We were 100% making things up as we went along. That’s why I don’t have a step-by-step photo guide on how to build these for your own home. However, I can tell you the steps we took and the materials and tools we used just in case you want to have a go at it. The shelves aren’t perfect, but they turned out even better than I imagined and I LOVE them.

Just heads up, we are in no way contractors and this was our first time installing shelves in this way. The process was messy and there were quite a few steps. It’s 100% doable and most definitely cheaper than paying for custom shelves to be installed. However, you can find pre-drilled floating shelves and bracket sets on Etsy and the like, so all of this isn’t necessary if you don’t have power tools or aren’t into DIY.

Tools used:

Jig waw, chop saw, power drill, orbital sander, fine-grit sandpaper, and caulk gun

Materials used:

2x10’s from Home Depot, caulk, spackle, wall paint, and heavy-duty floating wall brackets

Steps we took to create them:

  1. We cut the 2x10’s down to the size we needed using a chop saw. You could use a table saw or even a hand saw. Home Depot and Lowe’s can also cut them down for you if you know the length measurement when buying

  2. After the length of the wood was where we needed it, we used a jigsaw (again, you could use a table saw) to cut the depth.

  3. After both the length and depth cuts were made, we held the wood up in the space to mark where we wanted to hang each shelf.

  4. Once we knew the shelf height(s), we installed the floating brackets and spread them out to provide even coverage. We ended up doing 3 shelves, so we used 12 brackets total. They were installed with screws and wall anchors

  5. With the brackets installed, we held the wood shelves up to the brackets and marked precisely where to drill the holes needed to slide the shelves onto the brackets.

  6. David used two different drill bits to create the holes for the brackets. There’s probably a more efficient way to do this, but again, we worked with what we already had. He used a 1/2” cattle bit and a long (10”) drill bit. For floating shelves, you really want a power drill unless you’ve purchased pre-drilled shelves.

  7. After all of the holes were drilled, we attempted to slide the shelves onto the brackets. We ran into an issue which was the window trim. We ended up having to take chop the outer corner of each shelf off in order to slide the shelves onto the brackets (so they could get past the thick trim). We drilled chopped pieces back on after + used caulk/spackle to hide the cut.

  8. Once the shelves were all on the brackets, there were quite a few gaps between the wall and the shelves. so we ran caulk along the back and side edges to begin to fill the gaps. We had to wait until that was dry before assessing what to do next. TBH, there was a lot of waiting involved in this process.

  9. After the caulk dried, we added spackle to the larger gaps (those were mostly at the sides) using a putty knife. A LOT of spackle was used.

  10. Once the spackle dried, we sanded it down and added a more light-weight spackle to a few areas on the body of the shelves. Basically, we wanted to hide some of the natural grain and groves in the wood before painting. Again, this was sanded down a bit after drying.

  11. The first coat of paint when on. We mostly rolled the paint with a small roller to mimic a stone or plaster-type material.

  12. We applied an additional layer of light-weight spackle for any still-obvious graining coming through the paint. After that dried, we used an orbital sander to smooth it out a bit and then added a final layer of paint.

And that’s how we did it! Again, they’re not perfect, but they’re handmade and we love them.

3.19-4.jpg
Photo Mar 14, 11 34 08 AM.jpg
Photo Mar 17, 11 40 14 AM.jpg
3.19-3.jpg
Bedroom Sources
 

Our bedroom at the new spot isn’t quite finished yet, but since I’m generally a very impatient person, I wanted to go ahead and share where it’s at currently! You can find that post here.

I’ll add these over to the shop our home page in the future, but for now, here are the shoppable sources for the room. Some things, especially on the built-in shelves, are vintage, but I’ve linked where you can find similar.

We wanted this bedroom to have an overall calming feeling. Calm, collected, but still us. I hope you like it as much as we do! I think we can all agree that it’s come far from the ~ gold room ~

 
our new place
 

Before I start, you have NO idea how much I’ve wanted to tell you what’s been happening behind the scenes here over the last few weeks! However, I chose not to for a few reasons. First, we weren’t sure it was going to happen. In fact, we almost didn’t sign the lease as recently as last weekend due to concerns about being able to make small-ish changes, like painting and switching out light fixtures. The landlord also expressed concern about our cats, and you KNOW their needs come first, so I wasn’t about to move somewhere that had an issue with cats. To be clear, all of the landlord’s concerns were valid, we just felt that since we are unique renters due to my job it might not be a good fit. 

I was also feeling quite stressed and anxious about it all, and couldn’t mentally take on the questions that I would, understandably, be hit with.  I’m happy to say that after meeting the landlord, explaining how much we loved her building, and assuring her we would care for the apartment like it was our own, she was put at ease and so were we. 

Since I know I’m a curious person and would have SO many questions about this, I went ahead and put together a little Q&A to answer some questions you may have.  After all, my job is sharing bits of our life at home, so I’m hoping people will be interested and excited for us to make this move. Be warned, this post is WORDY, but it makes it easier to put all this info down in one spot. Without further ado, the answers to the questions I’ve fully made up haha….


Photo Dec 28, 12 59 26 PM.jpg

Why were you looking for a new place?

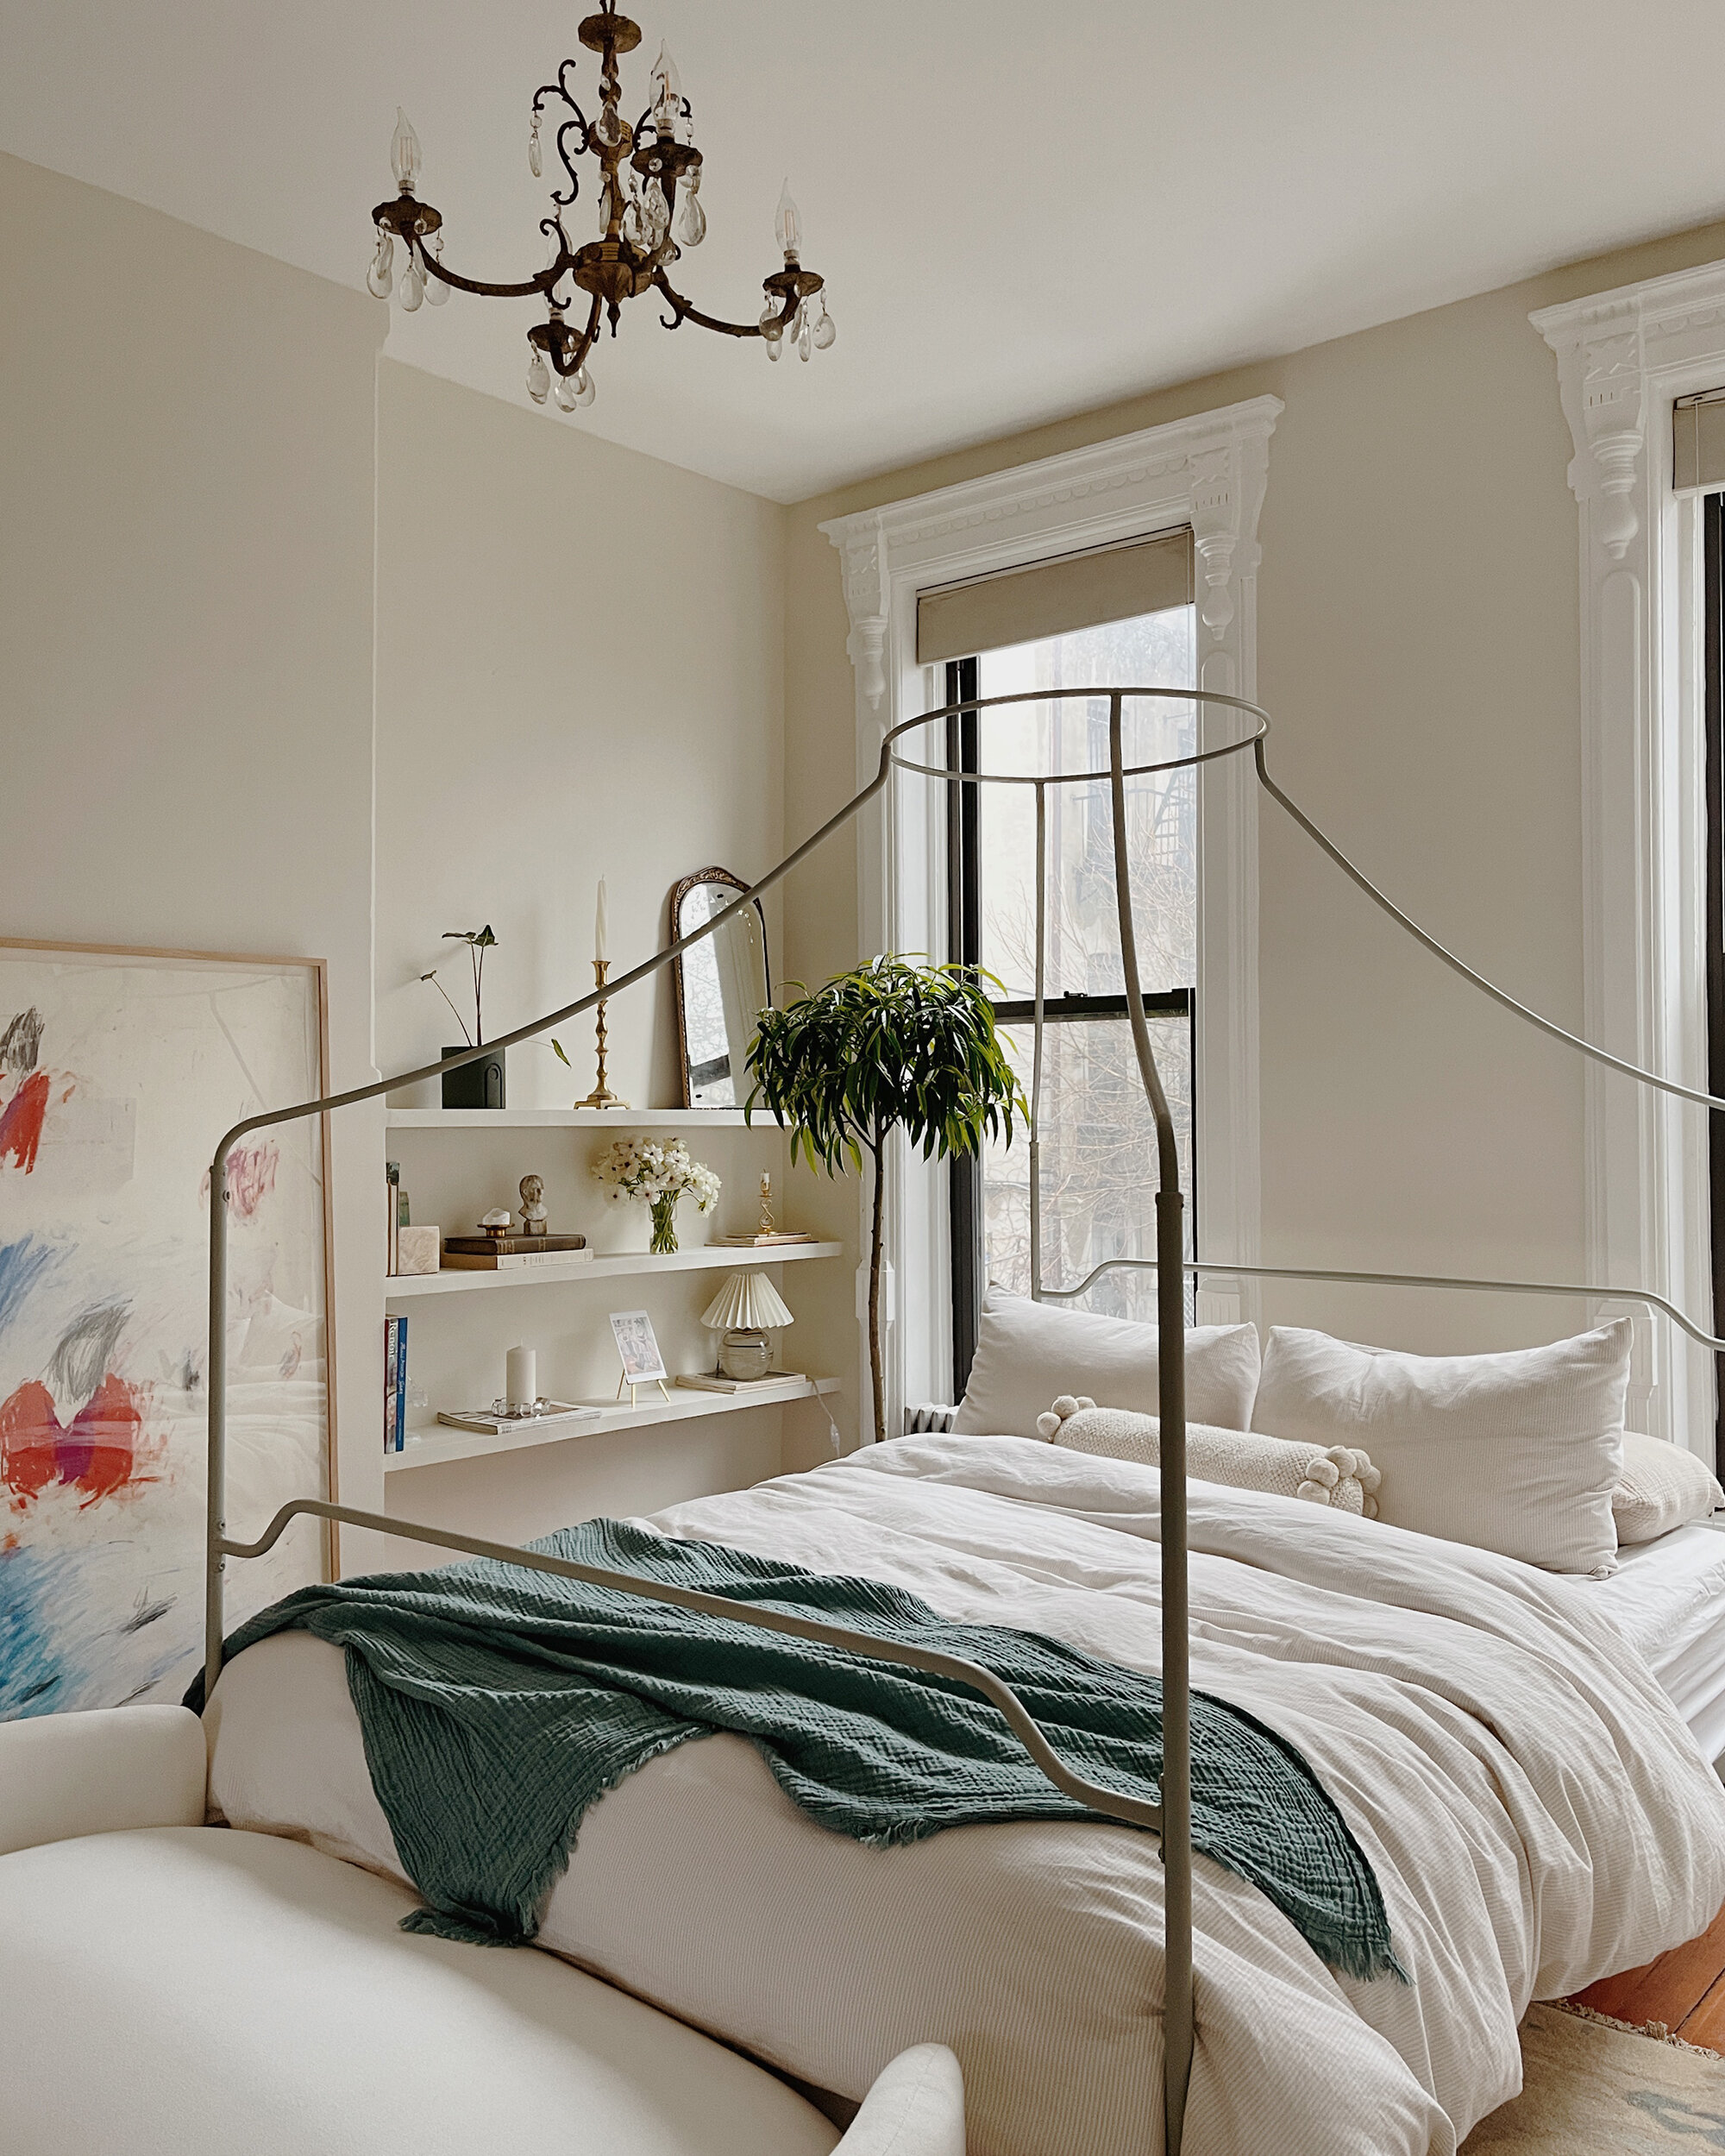
I’ve mentioned this recently in my stories, but since we expanded our little animal family and welcomed Frankie home, we felt strongly that we needed more space. NOT because the cats seemed uncomfortably cramped, but because WE did. We’ve been in our one-bedroom for over five years, but David has always wanted a studio with a window, and I’ve always dreamt of having a bigger bedroom. You know me, I’m always on the real estate lookout, but we did not expect to find a place so soon! I had very specific wants in mind, including historic details that aren’t easy to find in our budget. So when we found this spot, we did a double-take, got so excited that we stayed up all night dreaming about the opportunities, and went to see it the next day.

You’ve put so much work into your current apartment, why would you want to leave it after all of that?

This answer is long and a bit nuanced, because we don’t want to leave it, and for the time being we aren’t going to give it up entirely. I can explain though, so stick with me here! 

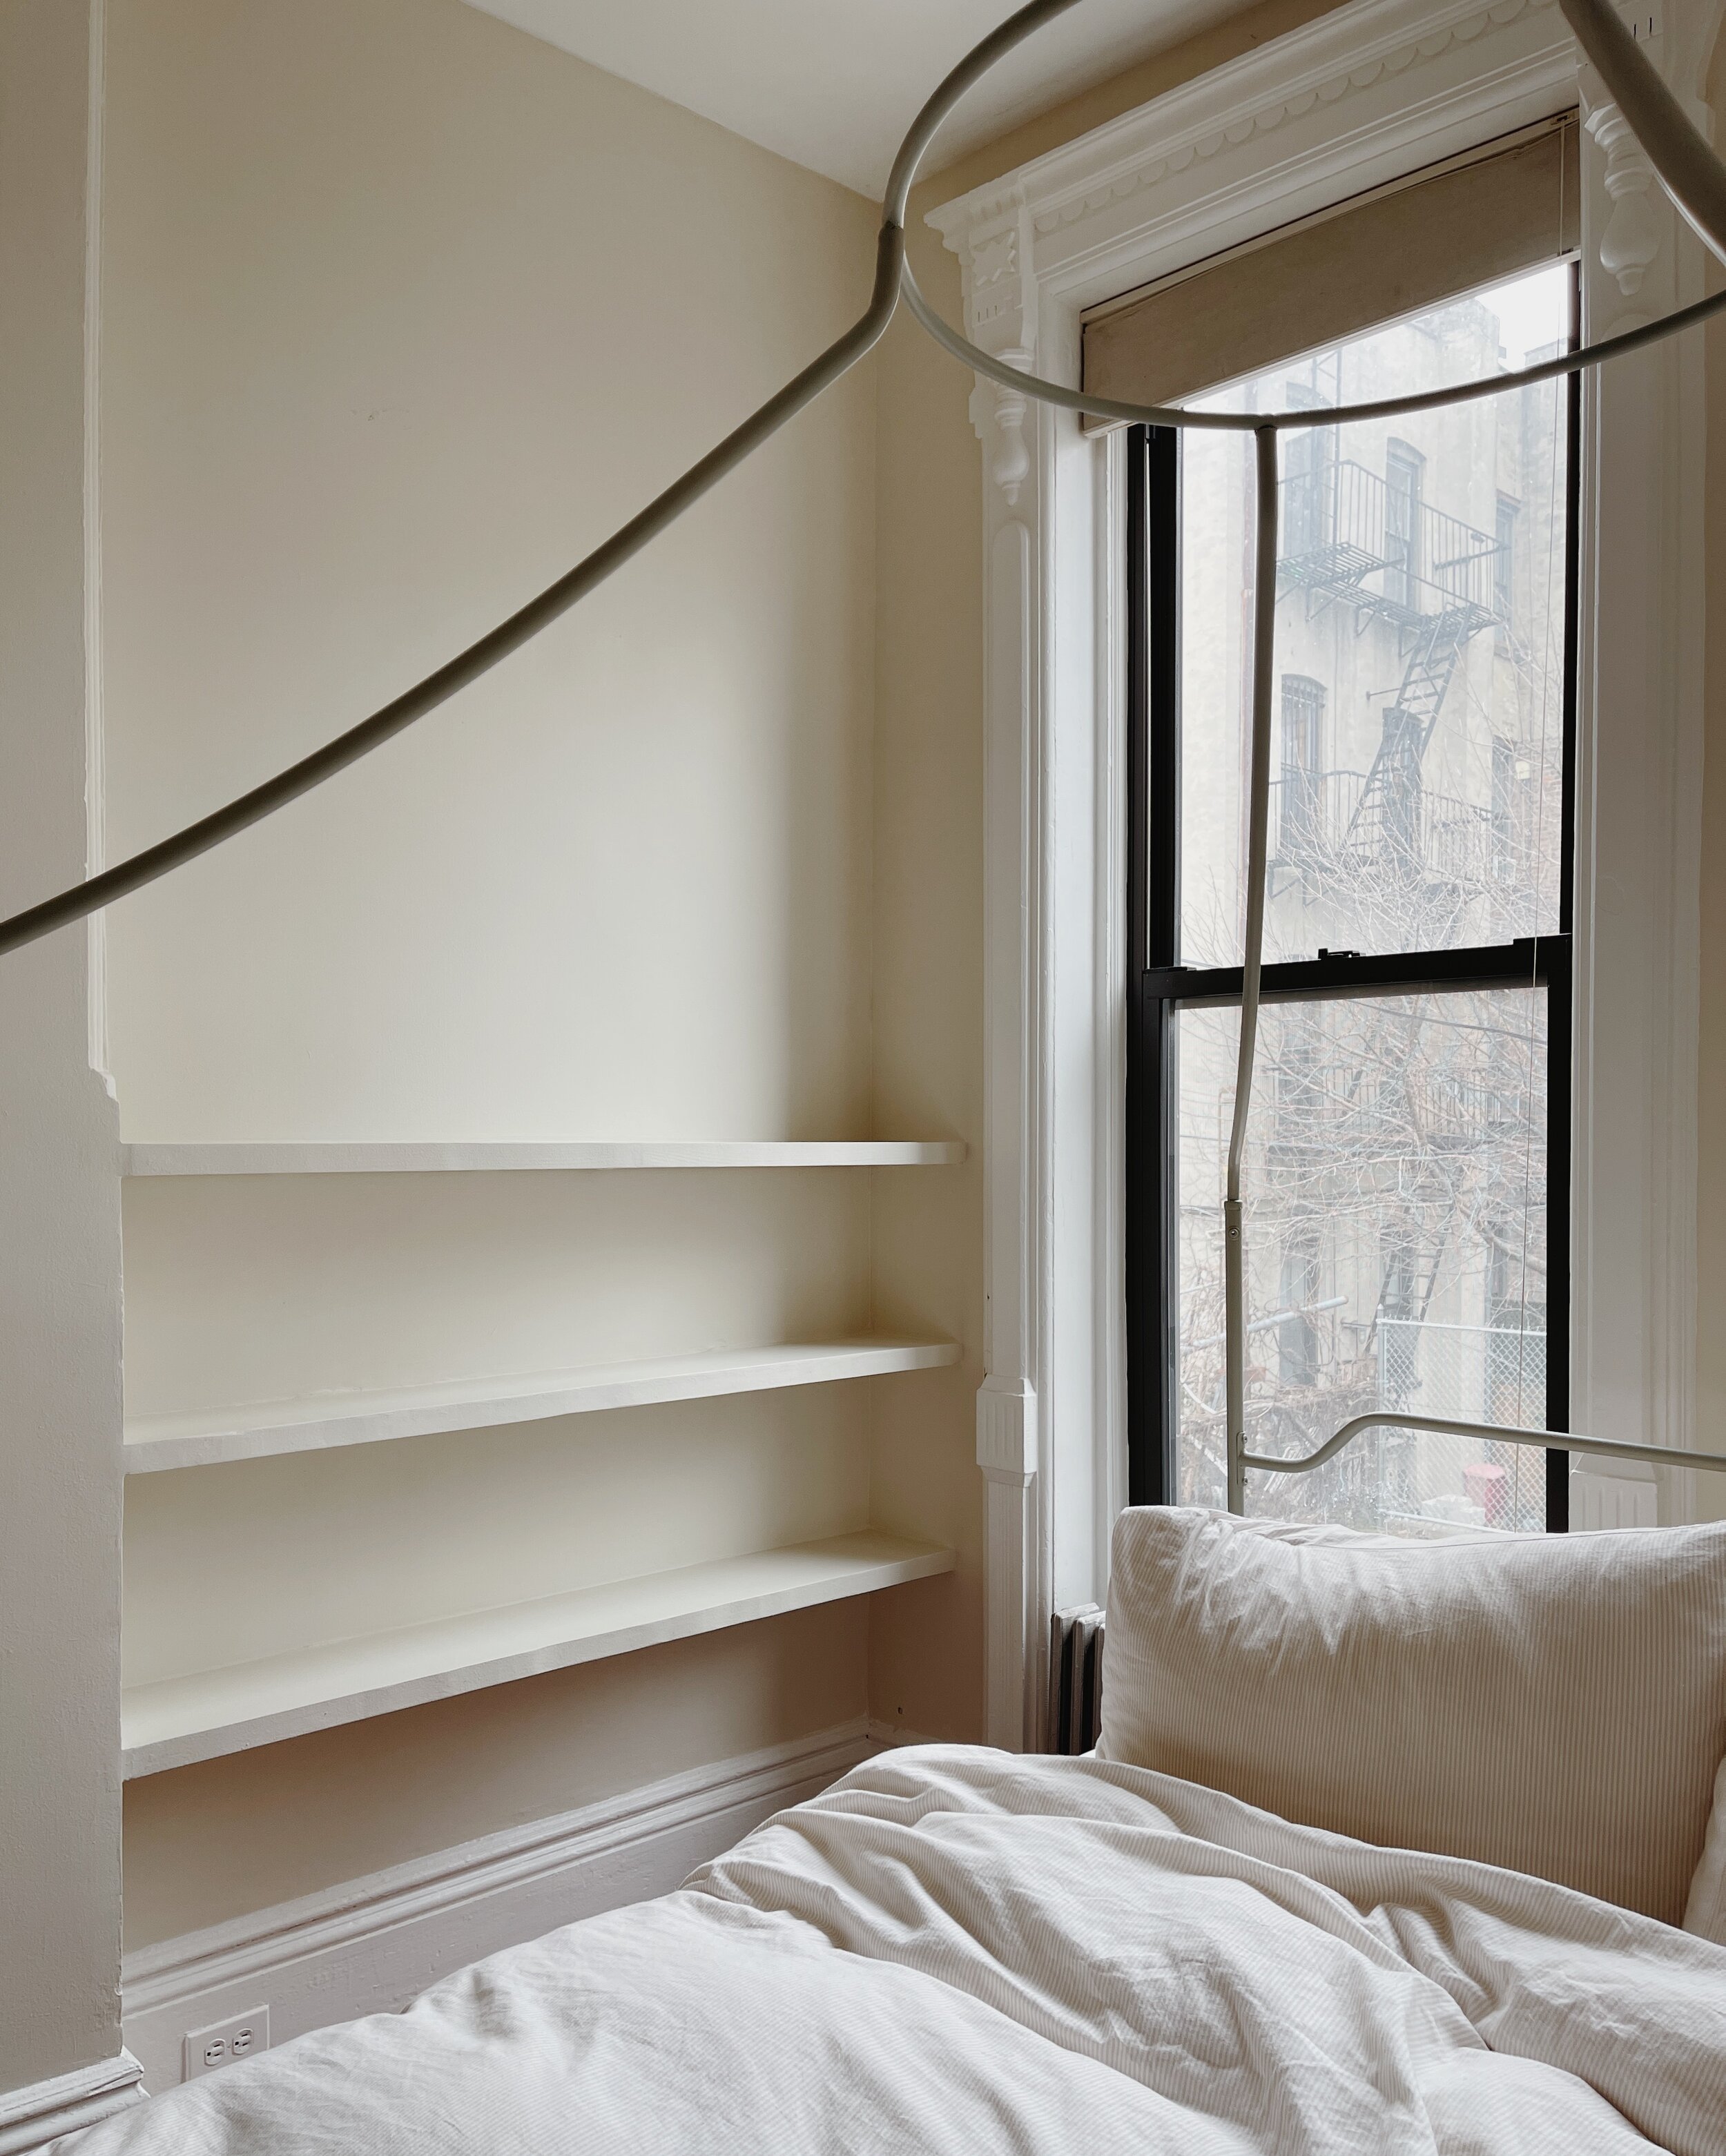
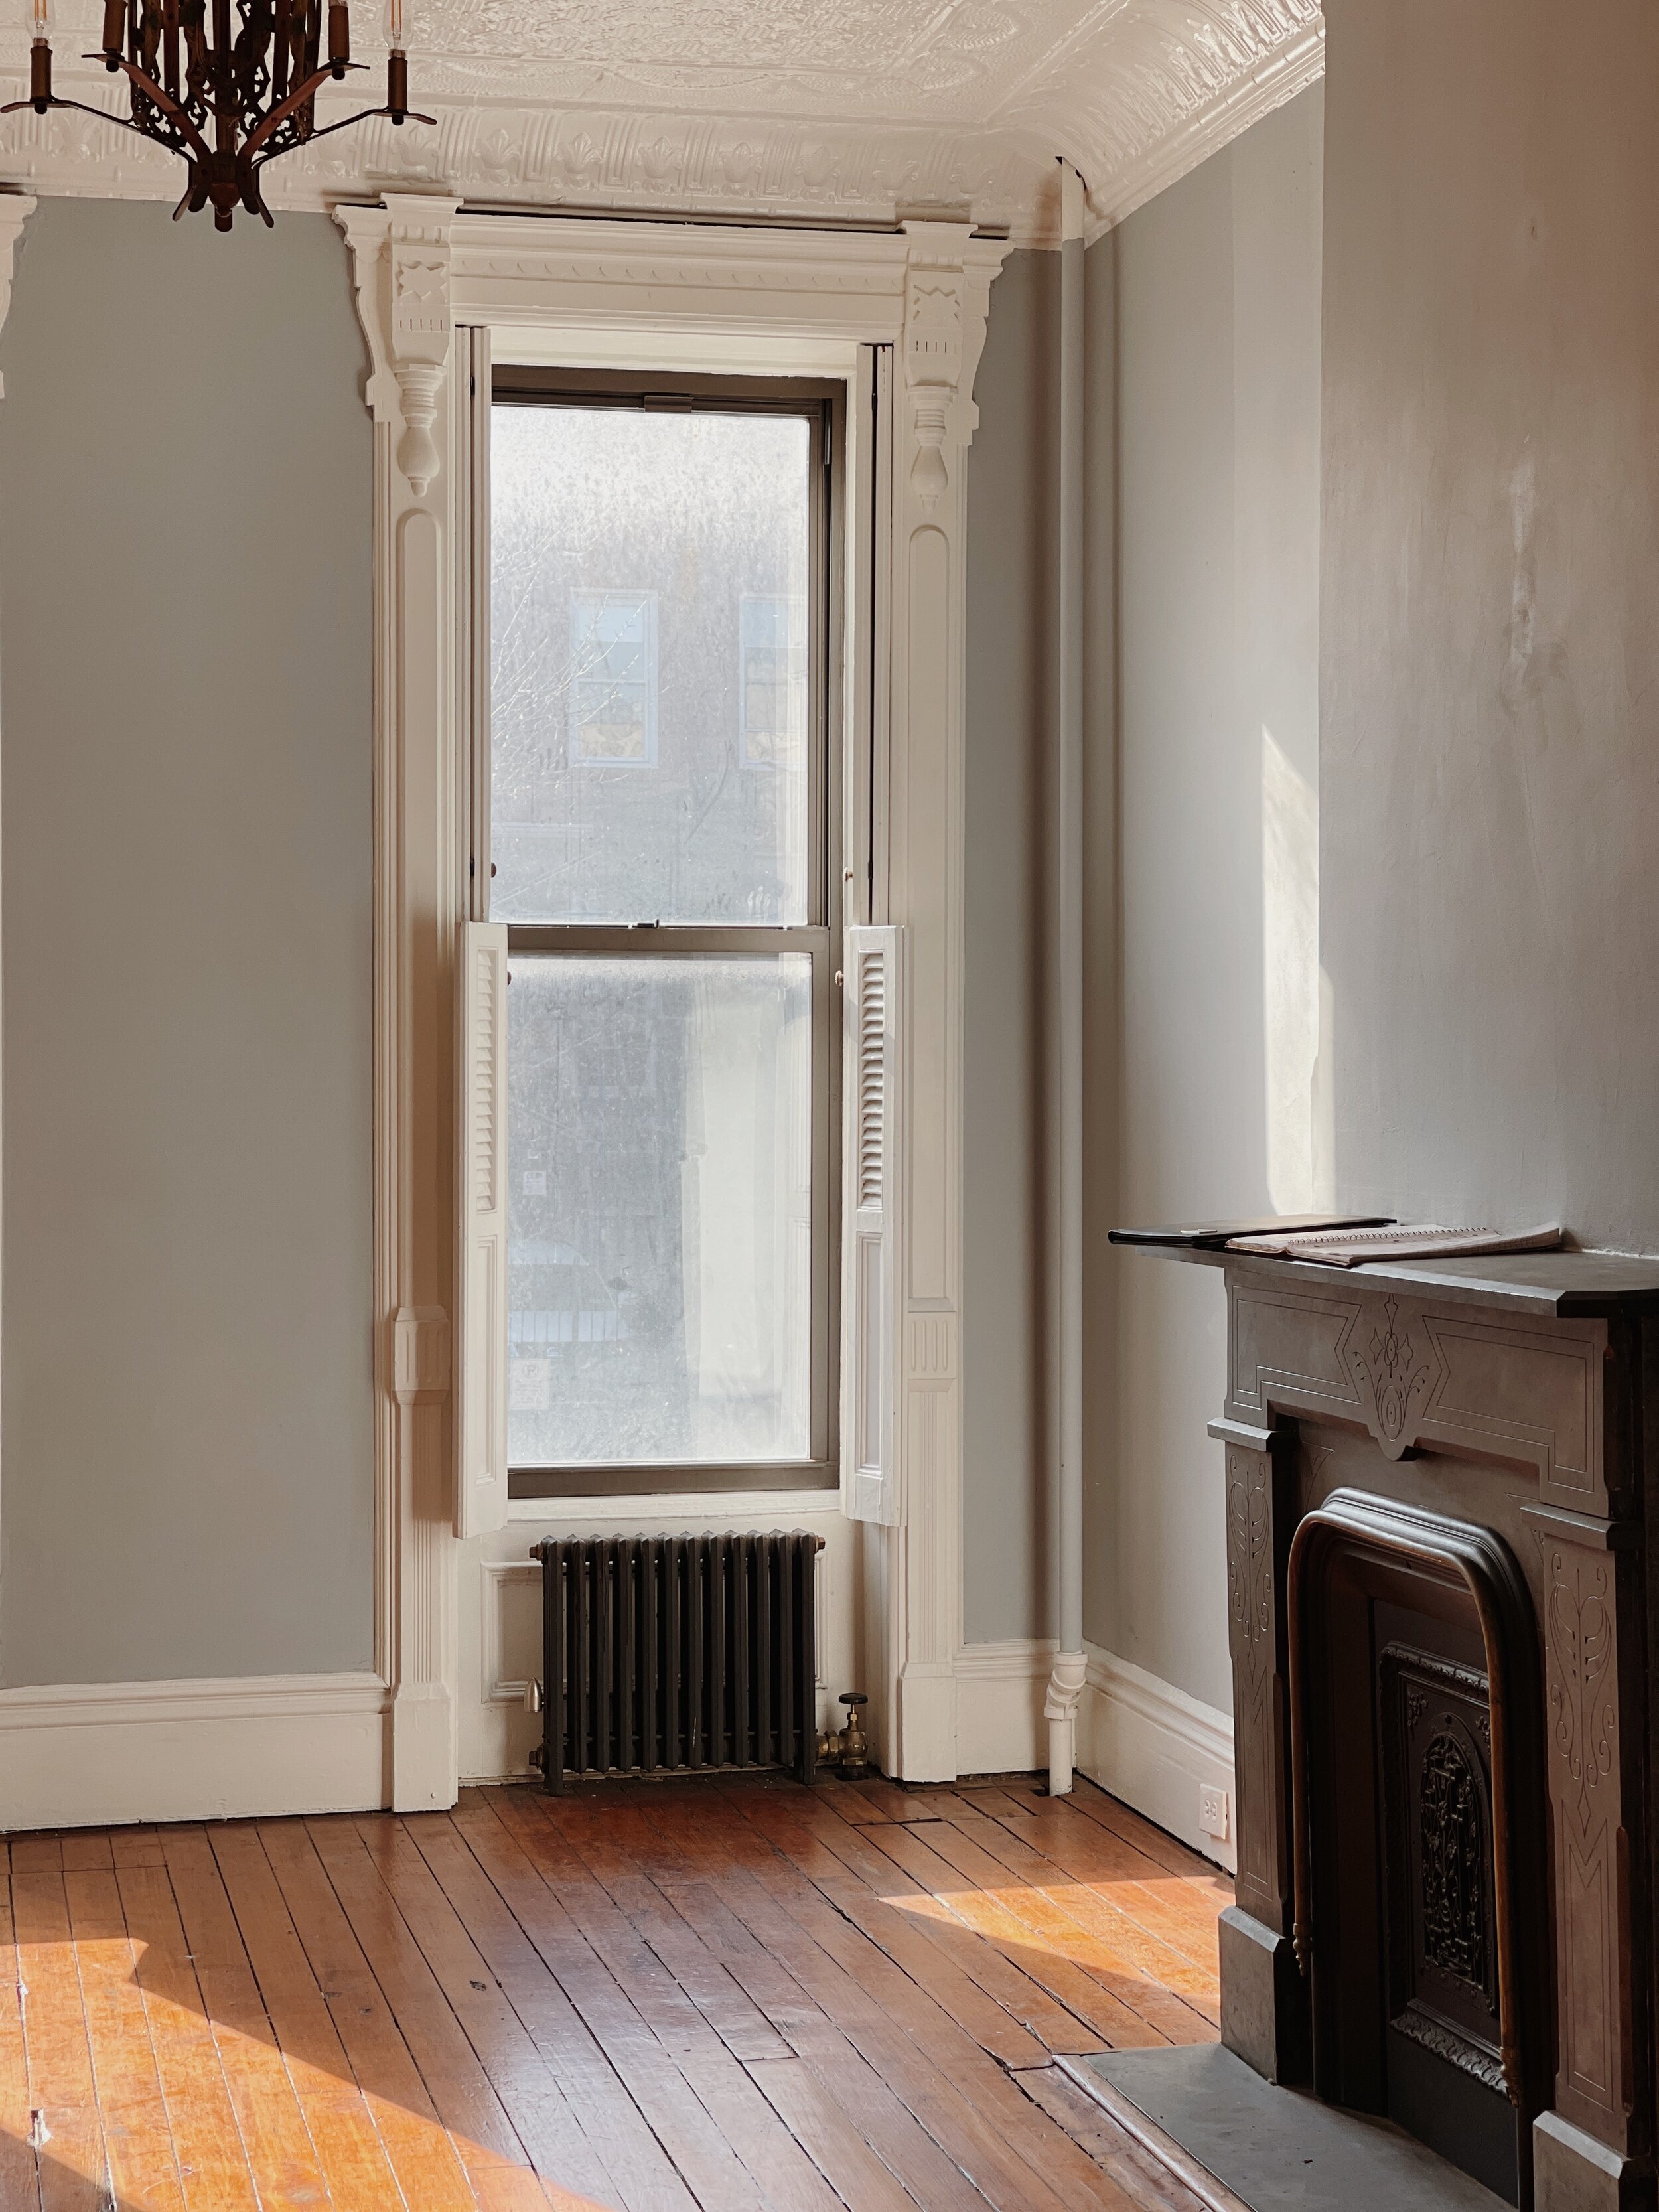
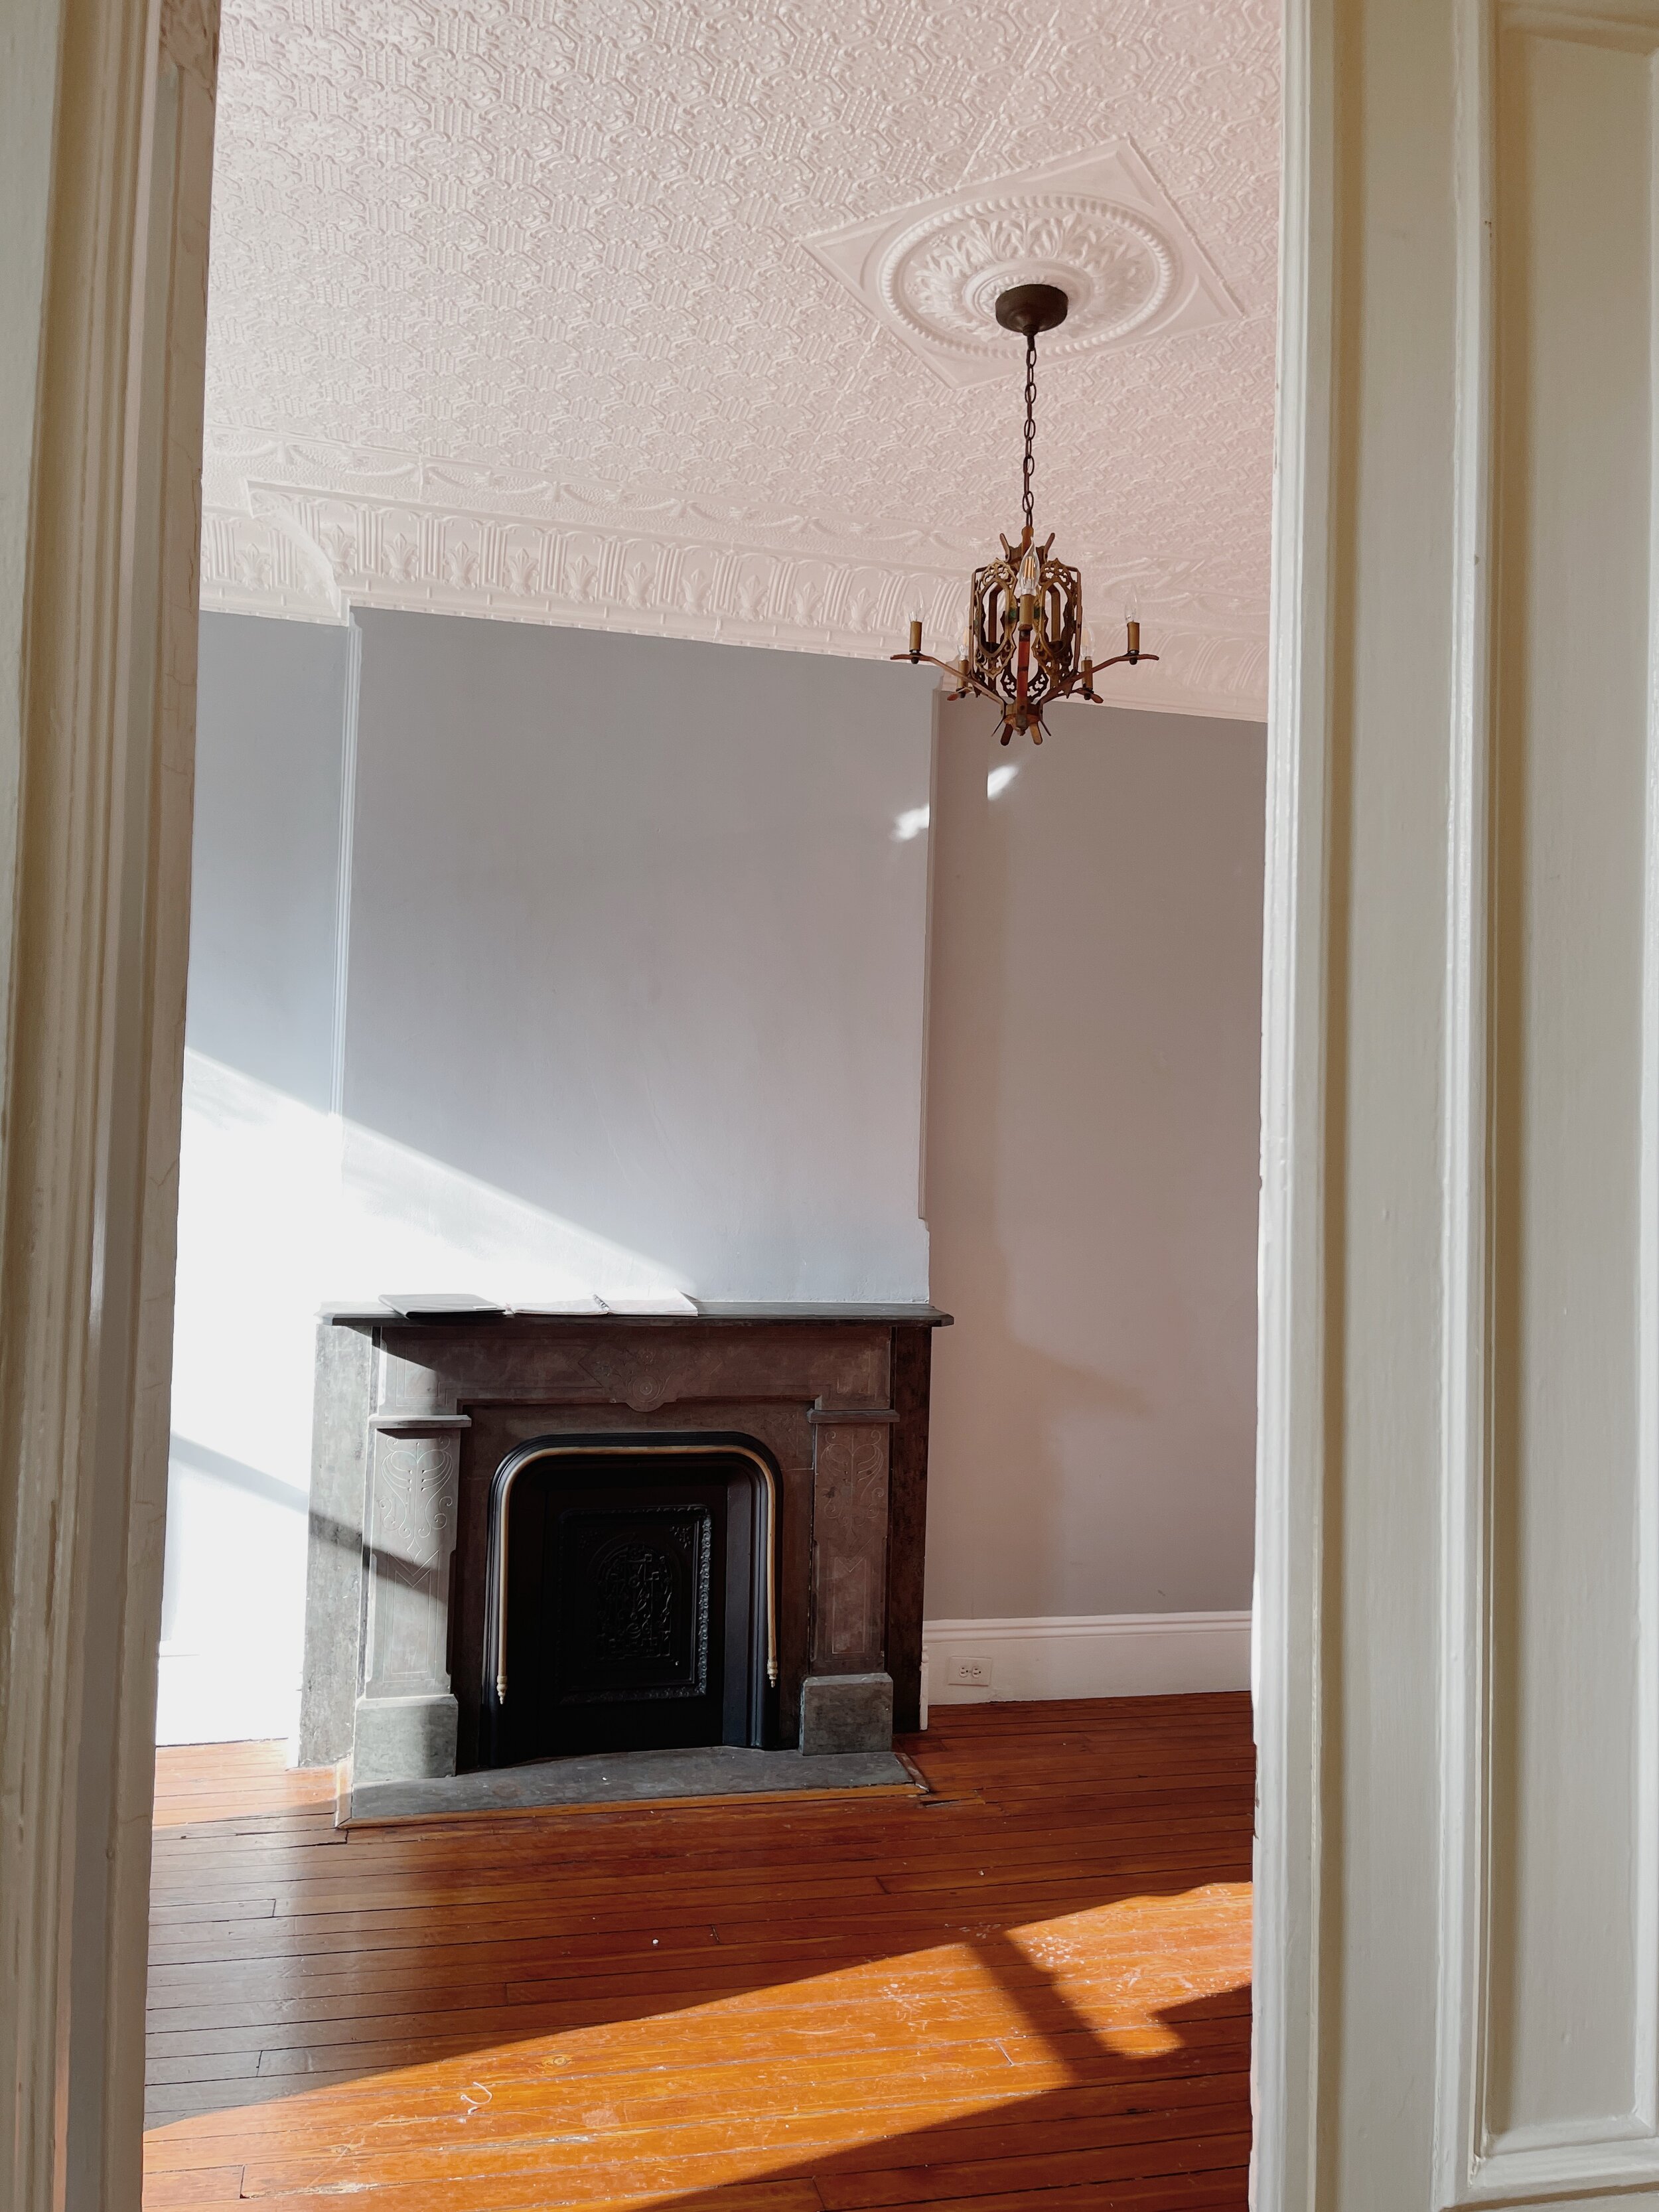
The new apartment is lovely. It’s exactly what we’ve wanted in our living space, it’s in a beautiful little brownstone, it has a room for David’s studio (with two windows!), original fireplaces, hardwood floors, a tin ceiling, my DREAM window frame moldings and shutters, and it was surprisingly listed within our budget. It’s all pretty perfect for us, except for the kitchen. I’ll share more about it soon and show you what I mean, but the kitchen is unusable at the moment.  Meaning, there’s no range or refrigerator and it’s basically an empty room with an old sink. Weird, I know. When we went to view the place, it was made clear that the landlord was planning to make some changes in the kitchen before anyone moved in. Given a large part of my job is sharing design projects, home decor, and DIY’s, we let them know in the off-chance they would be interested, that we would love to help make those changes. It’s a much smaller kitchen than ours and the work needed is not nearly as intense as our current kitchen was (i.e no tiling the floor).  It took some talking through, but we reached an agreement with the new landlord to make the changes ourselves. To be clear, if content creation in the home decor space wasn’t my job, we would not be doing this. I can’t stress that enough. We will be making it livable as quickly as we can, but until then, we will be sleeping at our current spot. So the first month or so will be a lot of painting, cleaning and working on the kitchen.

What happens to your place when the kitchen is done? Will you let us know when it’s available to rent?

As soon as the kitchen is done, we will bring the cats over and start living there full time. 

Of course, you will be the first to know when our Greenpoint place is eventually available! We have put so much work and love into this apartment, and I would be so happy to know that its next guardian would love it as much as we do. We’re not sure about our timeline and have a few ideas we want to flush out before letting go of it. 

Those ideas include renting the space out, furnished, for photoshoots while simultaneously using it as an office/studio space for Reserve Home. We’ve hosted a few small photoshoots in the past (who remembers when we were sequestered in the bedroom all day last month?! lol), and our place is on a few websites that specialize in promoting location rentals. Ideally, if we could host photoshoots here and there, it would help offset the additional rent. Believe me, I’m not so flush with cash that I can pay for two apartments like it’s no biggie. It’s just that my business is growing and hiring and working with a team out of my home isn’t ideal. I haven’t worked outside my home in years, so it would also be nice to have a place to go to work even just a few days a week.

I was nervous to tell you all about this idea, as wild as it may seem, but a close friend recently helped me think about it in an entirely different way. If I said that I was looking for an office or studio in a more traditional setting, say a coworking loft or small studio space, most people wouldn’t bat an eyelash even though the cost would be similar to keeping this place (believe me, I’ve looked). To be honest, I’m nervous about either of these ideas working for us financially and practically, so we’re thinking of it as an experiment for now. When we started searching for a new place, we never dreamed of keeping this spot too, but reframing how we look at it, plus the idea that we can always let this place go if it doesn’t go how we want it to, is comforting.

I should add that we’re on a month-to-month lease in our current spot. We have an amazing relationship with our landlord and neighbors and all of this gives us the freedom to stay here, temporarily or not, without the fear of being locked into long-term leases at two places, especially given these unpredictable times.

So if you’re keeping your current place, even for a little bit, how are you deciding what to keep there or bring to the new spot?

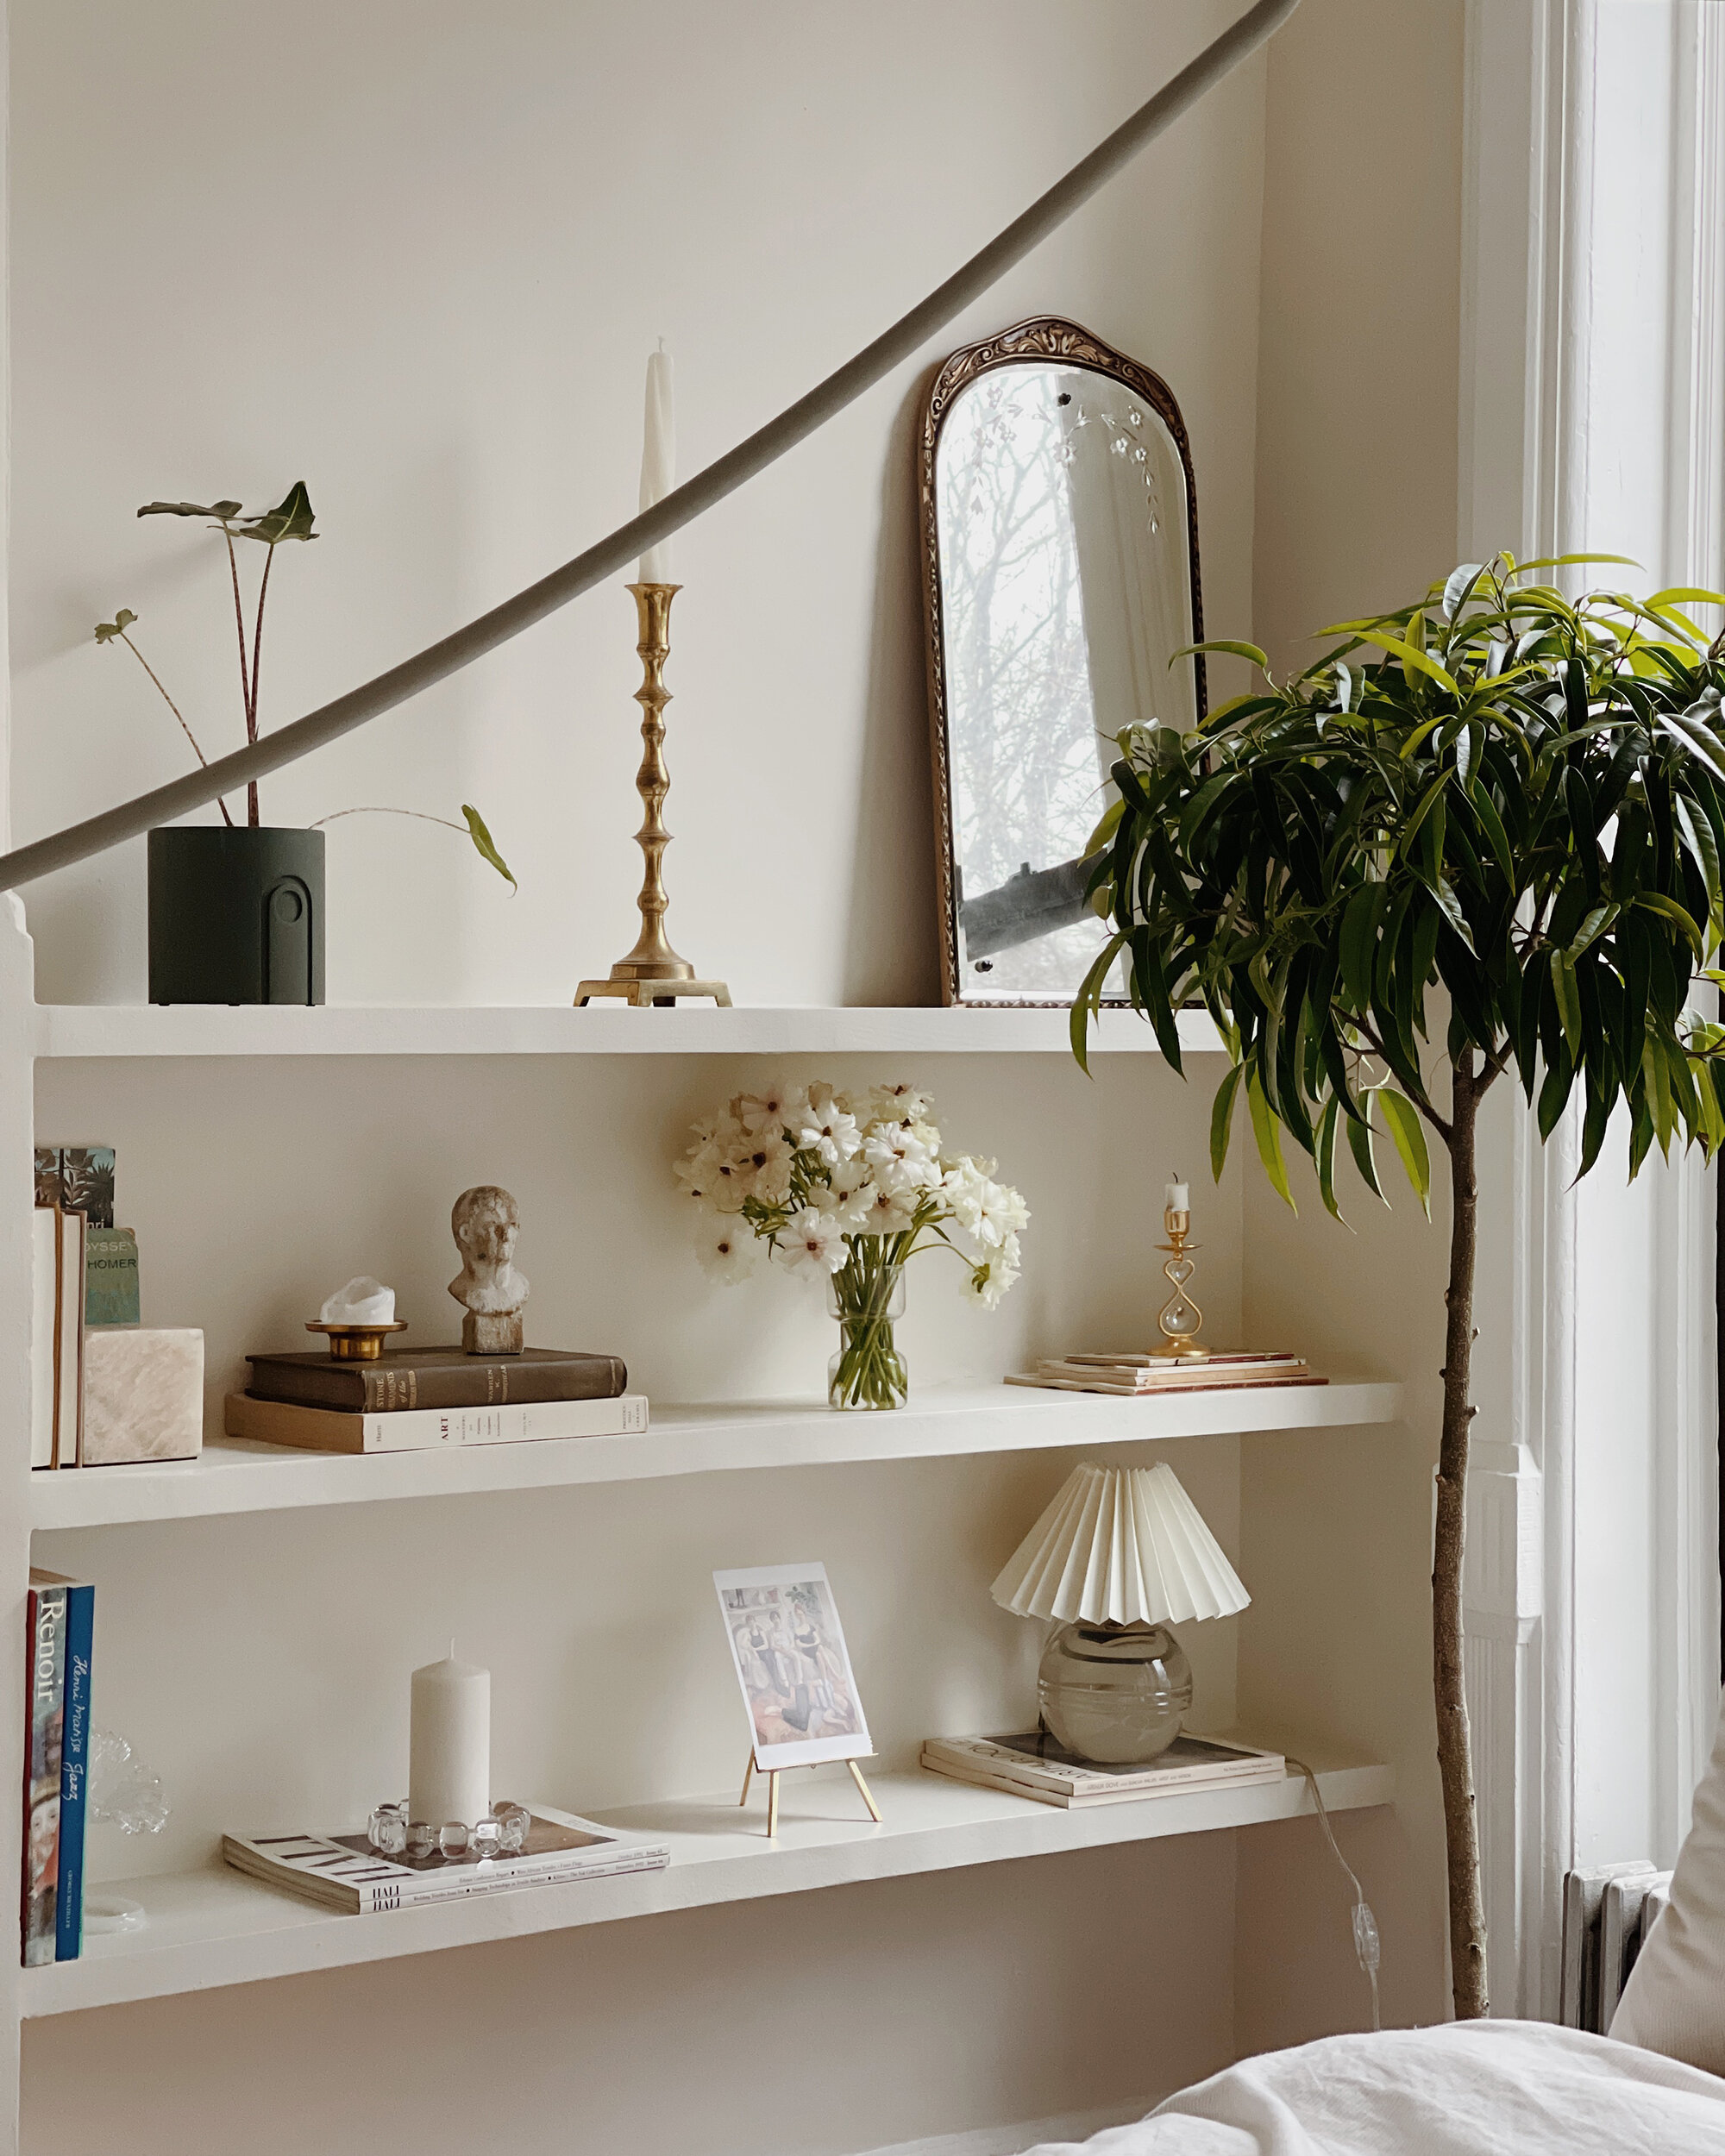
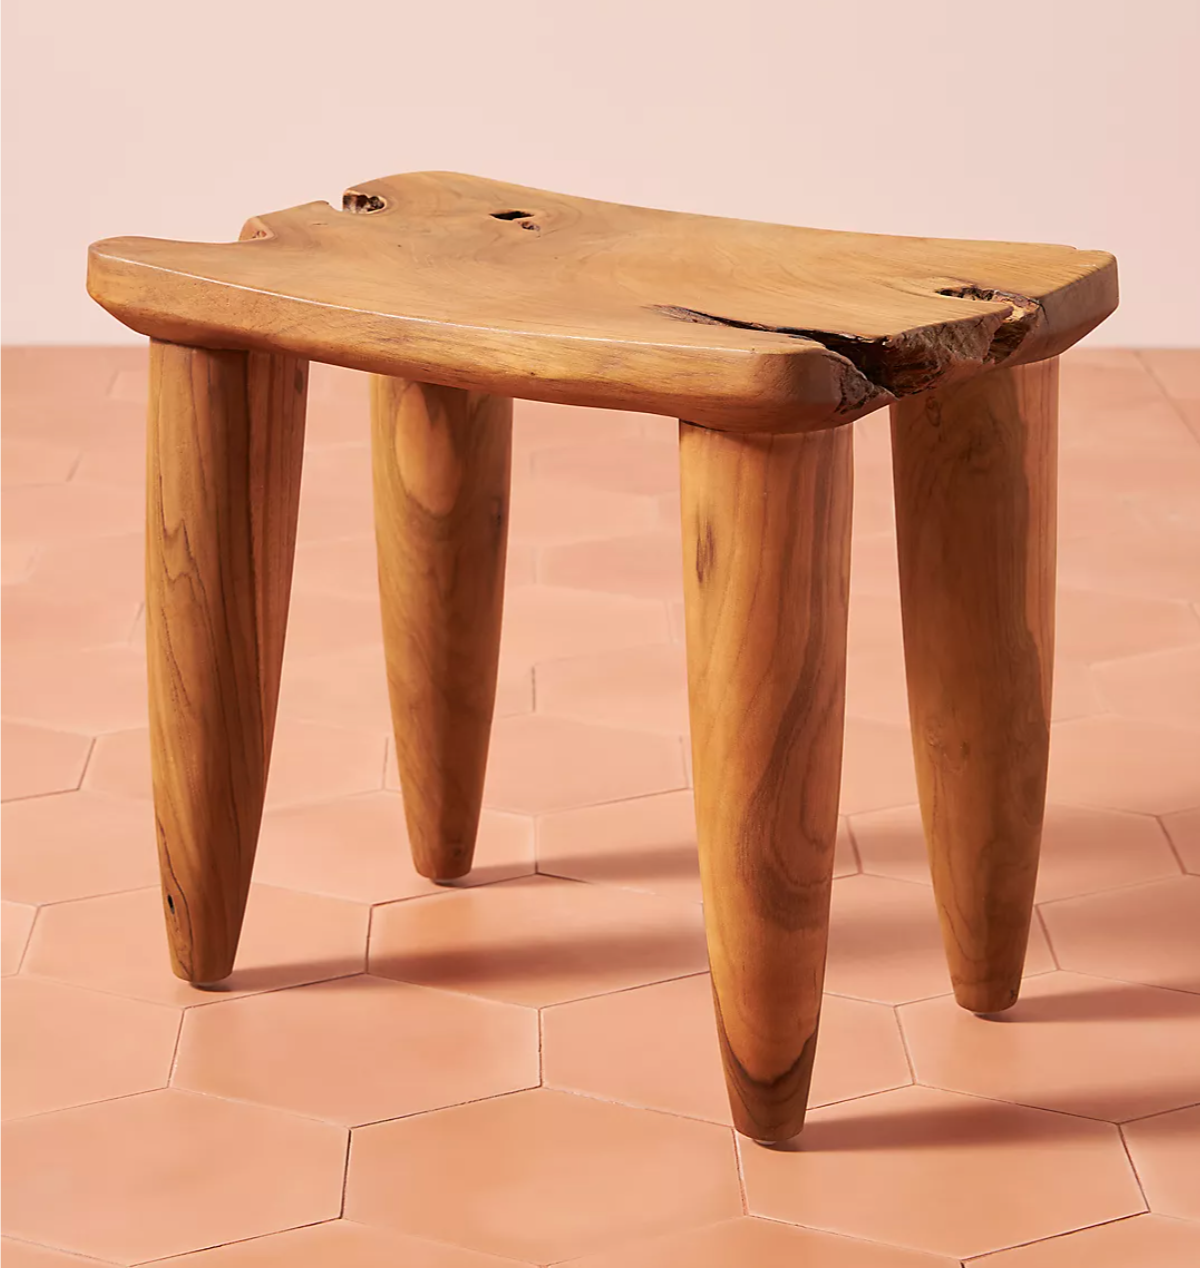
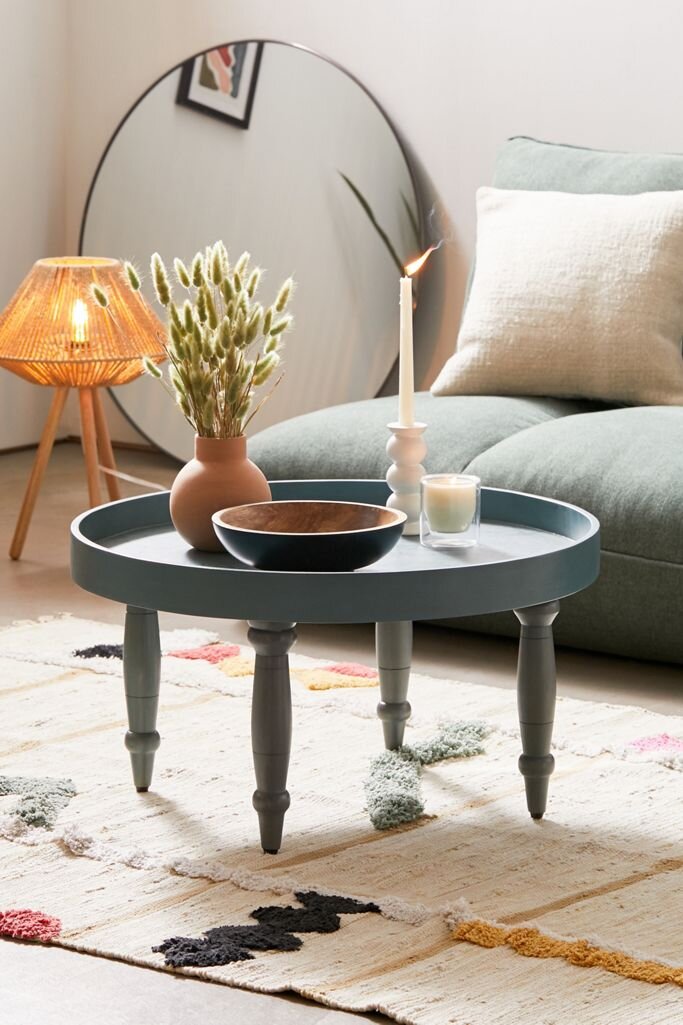
We’re still trying to figure this out! Many of the furniture pieces in our living room were chosen specifically to fit this space, so we will leave most of it until we know what the plan is more long-term. That includes the pier mirror, fireplace, and little sofa. We have some furniture in storage that we can use at the new spot and we will either purchase or try to partner with a few select brands to decorate as well. I’m going to take my time with this though since I firmly believe that designing a space should not be rushed and furnishing a larger apartment all at once is just not financially feasible. 

Why not just buy a place? This all seems a bit much for renters.

You have no idea how much we wish we could buy this new place or something comparable, but the reality of the situation is that’s not possible for us right now. Many people can’t afford to buy in NYC, and you know what, that includes us and we’re okay with that. Renter life isn’t so bad anyway! The key for us is to keep finding flexible landlords that allow a certain amount of freedom to create places that truly feel like home. Honestly, we’re really excited about this new place and see it as a stepping stone to grow my business!

When can we see more of this new place?

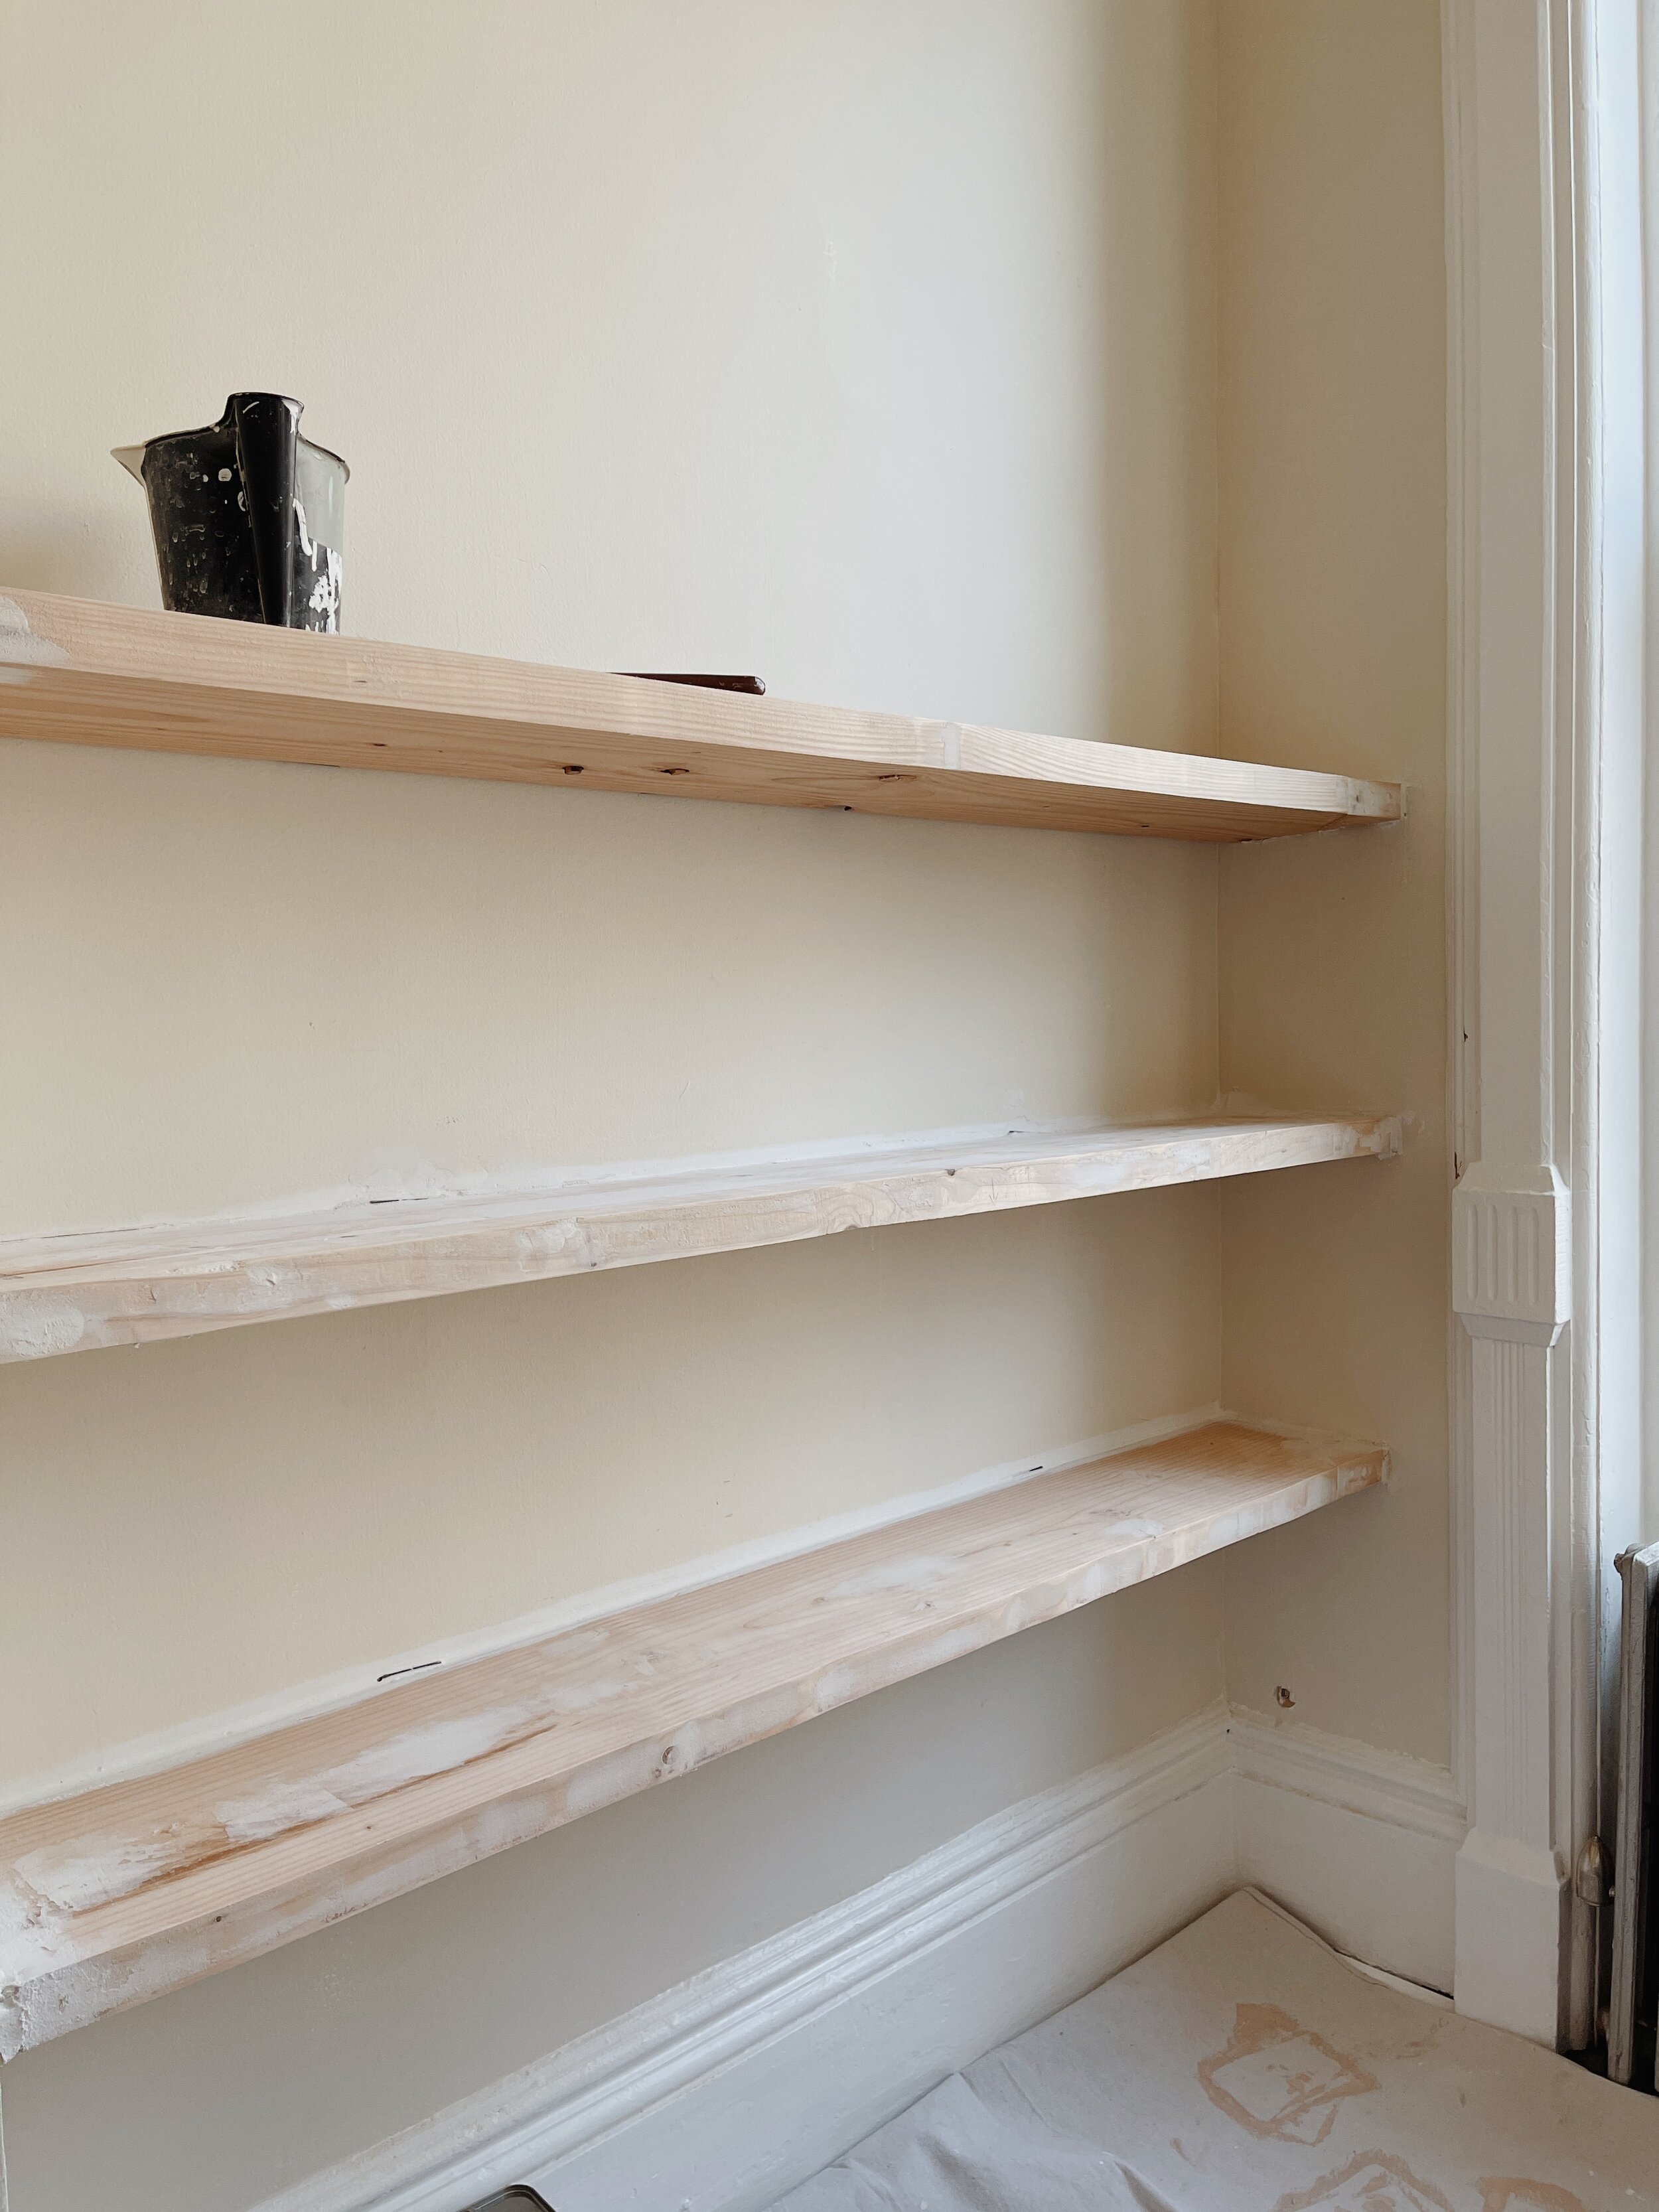
Very soon!  The first step was telling you. We got the keys yesterday and are beginning to clean and prep to paint some rooms. I will bring you along for the entire process! I hope to share a walkthrough tour soon. 

Is the new place close to your current spot?

Pretty close! It’s about a 15-minute drive, but still in Brooklyn.


If you’ve made it to the end, thank you! I appreciate you taking the time to read this and only hope you can understand why we’re making this move. I’m so excited to take you along for the ride. : )


xo Mal, David, Kiki, Mikey, and Frankie

Photo Dec 28, 1 19 34 PM.jpg


Mallory Fletchallhome, life
coffee table roundup

We’ve had our coffee table now for about 2.5 years and still love it so much. It’s asked about ALL of the time and solidified my love of round coffee tables, especially with sectionals. Still, I spilled 100% acetone on ours a few months ago (maybe avoid doing your nails at the coffee table eek) and so I feel like we may replace ours sometime in the near future. That got me thinking that I should do a coffee table round up, not just so I can start planning our living room changes, but also because it’s fun to share some of my favorites on the market right now!

I tried to include a variety of shapes and materials, as well as price ranges. I’m drawn to wood and circular or rounded styles, so naturally, you’ll see a lot of those added below. I’m especially partial to the plaster styles though. hubba hubba.

Many of the tables linked below are on sale right now! Which is your favorite?!

1. Chunky Plaster Coffee Table from Oken House Studios

1. Chunky Plaster Coffee Table from Oken House Studios

2. Wooden oval table from the Leanne Ford collection at Crate and Barrel. This whole collection makes me want to cry happy tears.

2. Wooden oval table from the Leanne Ford collection at Crate and Barrel. This whole collection makes me want to cry happy tears.

3. For those looking for more color in their lives. From Urban Outfitters Home.

3. For those looking for more color in their lives. From Urban Outfitters Home.

4. No joke, I want everything from Industry West. That’s probably why I’ve included three different styles from their site to this round-up.  Remember, these are all 20% off!

4. No joke, I want everything from Industry West. That’s probably why I’ve included three different styles from their site to this round-up. Remember, these are all 20% off!

5. One of the more affordable options and in the builder grade category at West Elm.

5. One of the more affordable options and in the builder grade category at West Elm.

6. Yep, I still love terrazzo. Love this piece from Pottery Barn.

6. Yep, I still love terrazzo. Love this piece from Pottery Barn.

7. Another Industry West Pick. It’s one table (although the three diff size options are shown here).

7. Another Industry West Pick. It’s one table (although the three diff size options are shown here).

No 8.  For those that want a little more glam in their lives. This mirrored coffee table is on sale at Urban Outfitters Home.

No 8. For those that want a little more glam in their lives. This mirrored coffee table is on sale at Urban Outfitters Home.

No 9. Probably my favorite coffee table option on Industry West. I love the unique shape and both sizes it comes in. Would be incredible to get both and display as pictured.

No 9. Probably my favorite coffee table option on Industry West. I love the unique shape and both sizes it comes in. Would be incredible to get both and display as pictured.

10.  Sarah Ellison Studio has created SO many beautiful pieces, including this rattan table with brass details.

10. Sarah Ellison Studio has created SO many beautiful pieces, including this rattan table with brass details.

11. Another affordable piece from West Elm. I love the minimal look to this coffee table.

11. Another affordable piece from West Elm. I love the minimal look to this coffee table.

12. Sarah Ellison Studio strikes again with this glass topped table.

12. Sarah Ellison Studio strikes again with this glass topped table.

13. Lastly, the table I want! I absolutely love this plaster table from Oken House Studios on Etsy.

13. Lastly, the table I want! I absolutely love this plaster table from Oken House Studios on Etsy.